Monday 1 October 2012

Everyone loves a French tart - {Strawberry Tart Recipe}


This is a departure from my usual fare.  There is no chocolate in this recipe.  None at all.  Weird.

My old man turned 73 last week, and he isn't really a dessert fellow.  We always have a family get together to celebrate birthdays in the Collins clan, and it has become tradition that I make the dessert.  What to make for the man who doesn't really dig dessert? He adores a really good vanilla ice cream.  Given a preference that is what he would always choose, but you know me.  I always end up deviating from the plan.  There are few sweet things that the man likes, but strawberries are on the list, so I decided to make a strawberry tart.  The best tarts I have ever tasted were in Paris (during the one day I was there before evil morning sickness overtook me and I couldn't eat a thing, which is one of the many reasons why I simply MUST go back.  It is every person's prerogative (I wish I didn't get Bobby Brown in my head every time I said that word) to participate in a gastronomical overindulgence in that city and I was robbed of that right damn it!). Phew.  That was a very long sentence.

Herein lies a problem.  Sweet shortcrust pastry and I have a chequered history.  We haven't really gotten along.  The few times I have tried to make it it has been the middle of summer and it just hasn't worked.  The last time I tried to make it I ended up completely changing my plans to avoid pastry entirely. Shortcrust pastry, fine. Sweet shortcrust pastry. Not fine. The sugar changes the pastry and makes it much more difficult to manage than the regular variety.  It is lucky that I like a challenge. I wasn't going to be beaten. I wanted that shortbread-like base.

Don't be daunted by this recipe.  It seems really long but it is just three different processes that come together to make a beautiful tart.  The pastry and the filling can be made a day ahead if you are pressed for time.    

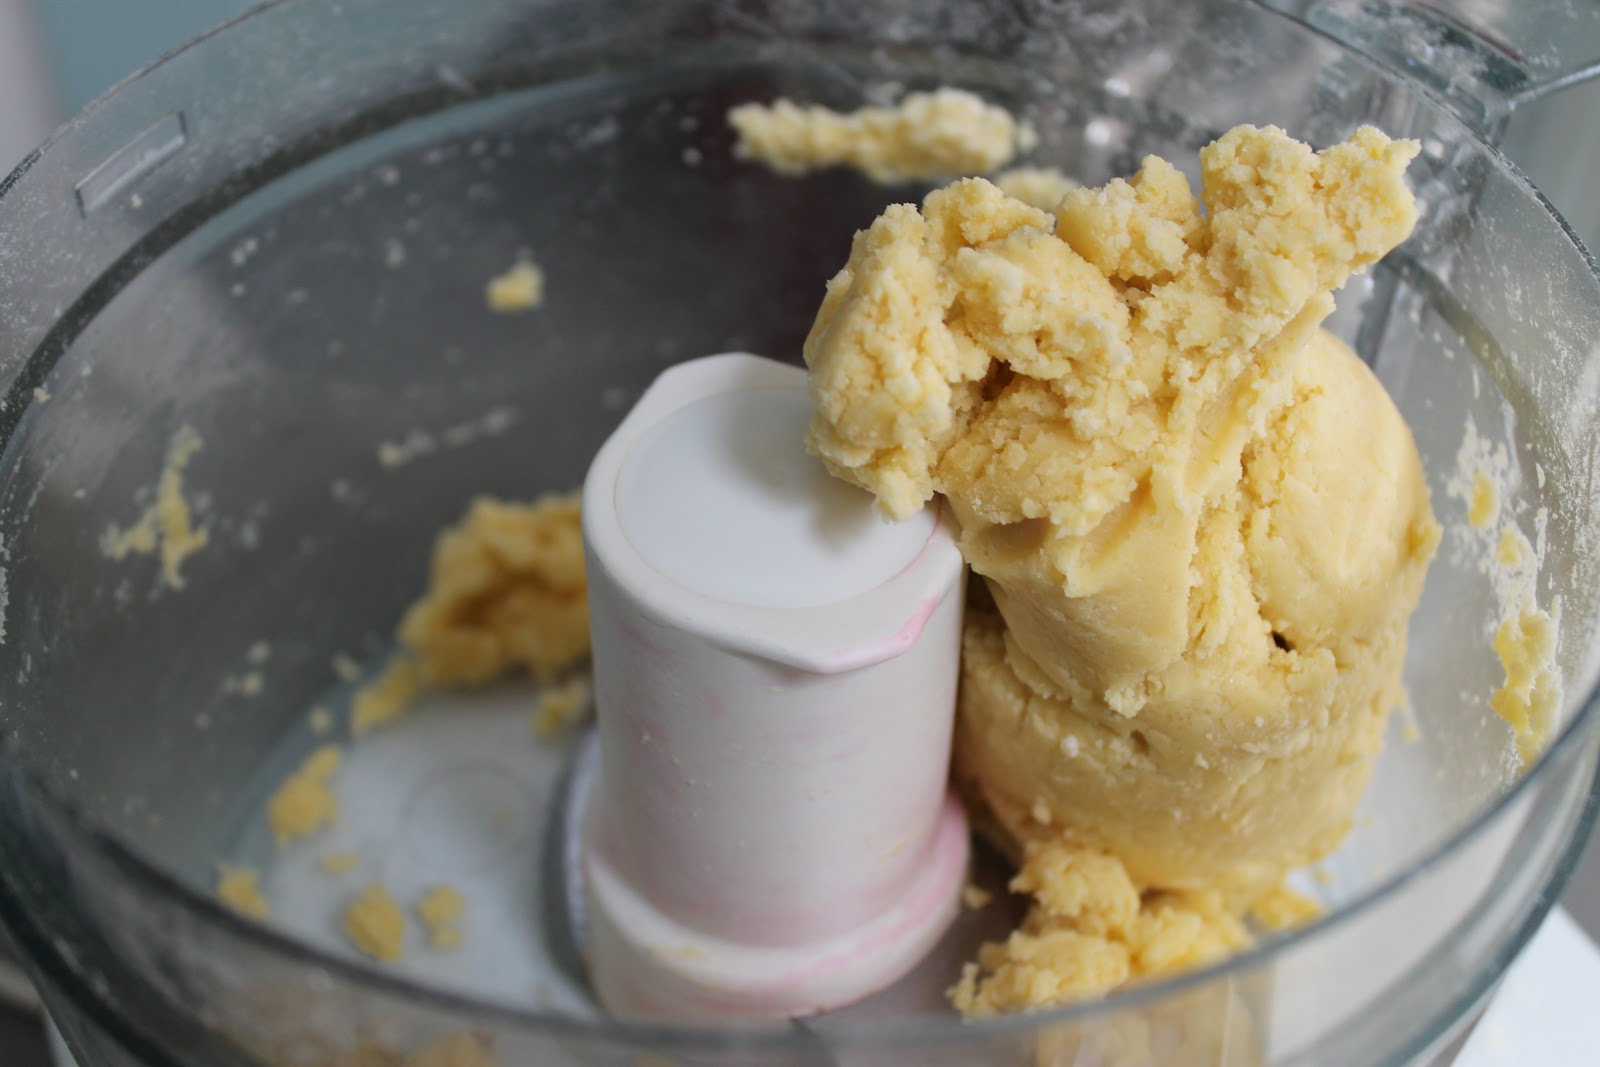
Sooooo, I combined flour, salt, sugar and cold butter in my fabulous food processor (we were very lucky to be given a Magimix as a wedding present in 2002 - it has never skipped a beat).  I pulsed until the combination resembled breadcrumbs.


Now if you are wondering why my food processor is a lovely shade of pink, blame this excellent spiral cookie recipe by Sprinkle Bakes.  I have made them over and over and they were worth the processor tint, I assure you!  I digress...

I lightly mixed an egg with a few teaspoons of water and, while the motor was running, added it to the food processor.  As soon as it started to form a ball I stopped the motor.


Put the dough from the processor on to a piece of cling wrap, form a flat disc, wrap it and put it in the fridge for a minimum of an hour.  Do not under any circumstance skip this step.  One of the reasons my previous attempts at this pastry failed was that the recipe I used suggested chilling the dough for twenty minutes.  Not enough.  It MUST be at least an hour or the dough will be unmanageable.


Once you have chilled the dough it is ready to roll out.   The dough can be quite sticky and rather than adding more flour, which will change the consistency of the dough, your best bet is to roll it out between two sheets of baking paper, like so -


Now it doesn't have to be perfect.  A trick that I picked up while reading about this blasted pastry was that you can mould it, a bit like putty, if it isn't behaving and rolling out as you would like.  Roll it out as best you can, and then, while it is still attached to one of the pieces of paper, place it face down over a flan tin.  Press it in to the edges of the tin BEFORE you remove the paper.  That way the dough won't stick to your fingers and get holes in it.


Gently remove the paper.  Don't fret if there are holes or the sides aren't completely covered.  Trim the pastry around the sides and use the excess to repair any damage and fill any gaps.  Using a fork prick holes in the base.  Chill the case for at least twenty minutes before baking.

Now the case needs to blind baked.  This is a process whereby the pastry is cooked before being filled.  It prevents the pastry from becoming soggy and will help it to be nice and biscuity.  The first step in this process is to line the case with foil.  Fill it with rice, or pastry weights if you have them (I do), to help the pastry to hold shape.

Ceramic pastry weights
Bake the case at 200 degree Celsius for 15 minutes, remove the weights and foil, and bake for a further five minutes.  Keep an eye on the pastry as it can start to burn very quickly.

Oh my.  I just successfully made a sweet shortcrust pastry case.


Now on to the filling.  It is called creme patissiere, or pastry cream, and it is divine.  You would be familiar with it as a filing in many fruit tarts, eclairs and canoli.  It is a thick custard that is perfect with strawberries and pastry.  You need to scald milk with a vanilla bean in a saucepan.  This means that the milk is heated until just before boiling point.  In a separate bowl beat egg yolks with sugar and cornflour until thick.  Remove the vanilla bean from the milk, scrape out the seeds and add them to the egg mixture.  Pour milk into the egg mixture and use a wire whisk to whisk until smooth.  Return mixture to the cleaned saucepan and stir continuously with the whisk until the custard has thickened, is smooth and has come to a boil.


Pay careful attention to the base of the saucepan to ensure that the custard doesn't burn.  Once the custard is boiling whisk vigorously for one minute.   Immediately cover with baking paper or cling wrap to prevent the custard from forming a skin.


Chill.

Once the pastry and the creme patissiere are cold they can be united.  Fill the case and level out the custard with the back of a spoon.  Cover the custard with a layer of halved strawberries, starting with one half in the centre and working in concentric circles outwards.  Once the tart is covered you want to give the tart a lovely shiny coating, just like the tarts in Paris.  This is done by coating the strawberries with a glaze made of jam and warm water.  Voila.  The flavours of each element come together to make a beautiful tart.


I loved this dessert.  There was no chocolate and I loved it.  I am looking forward to making it again, and will try it with other fruit.  Raspberries come to mind.  I LOVE raspberries.  Raspberries and chocolate make a fabulous combination, but that is another matter...

{Strawberry Tart}

For the pastry -
200g plain flour
1 teaspoon salt
1 tablespoon sugar
100g cold unsalted butter, diced (it MUST be cold)
1 large egg
2 teaspoons water

Briefly blend the flour, salt and sugar in a food processor until combined.  Add the butter and pulse until the mixture resembles breadcrumbs.  Lightly mix the egg and water and add to the food processor while the motor is running.  As soon as the dough begins to form a ball stop the motor.  Turn the dough out on to a sheet of cling wrap, form a flat disc with the dough, wrap it and put it in the fridge for a minimum of one hour.

Preheat the oven to 200 degrees Celcius.

Roll the dough out between two sheets of baking paper, take one sheet of paper off the dough, lift the remaining sheet of paper with the dough and place it face down over the flan tin.  Press the pastry in to the sides of the tin, lift the paper from the pastry and trim the edges.  Use the excess to make any repairs, and prick the base of the case all over with a fork.  Line the case with foil, fill with pastry weights or rice, and bake for fifteen minutes.  Remove the foil and weights and bake for a further five minutes.  Cool.

For the creme patissiere -
2 cups of milk
1 vanilla bean, split, or one teaspoon of vanilla bean paste
6 large egg yolks
3/4 cup castor sugar
50g cornflour

Run a knife along the vanilla bean so that it is split all the way along.  Place the milk and the bean in a medium saucepan and heat until just before boiling. Remove vanilla bean, scrape out the seeds and add them to the milk.  

Meanwhile, in a large bowl beat egg yolks with sugar and cornflour until thick.  Pour in milk and whisk until smooth.  Return mixture to the rinsed-out saucepan and stir continuously over a medium heat until it has thickened, is smooth and is boiling, paying particular attention to the bottom of the saucepan to make sure that the mixture doesn't burn.  Take the mixture off the heat and whisk vigorously for one minute to ensure that the mixture is smooth.  Place baking paper or cling wrap over the creme to prevent it from forming a skin.  Cool.  The creme may need an extra whisk before using depending on how long it sits.  

To assemble -
500g strawberries, hulled and halved
2 tablespoons strawberry jam
4 tablespoons warm water

Fill the cooled pastry case with the killed Creme Patissiere.  Level the surface with an offset spatula, or a spoon.  Starting at the centre of the tart, place the strawberries face down in concentric circles, moving outwards.

To make the glaze combine the jam and the warm water and pass through a strainer to remove the lumps.  Brush the glaze on to the strawberries using a pastry brush.  Leave to set for a few minutes.  Serve.

Note - I believe that this tart benefits from some chilling time before serving as it firms it up a tad.  My husband prefers it unchilled and a little less firm (just like he likes his women ;-)).  Do with it what you will!

Susie xx


Monday 6 August 2012

Testing a bold claim - Pioneer Woman's best ever chocolate sheet cake


I know it is really hard to believe but in the week that was my husband's birthday we had our fill of peanut butter and chocolate baked goods.  Well and truly.  No more.  We had one party to go and I had planned a peanut butter pie with Oreo crust but there was no way that either of us were interested in consuming such a thing.  I am certain that it will be in my future, but for now I needed a plan B.

I flicked through a few of my favourite baking blogs to find some inspiration.  One of my favourite baking bloggers, Bakerella, had written a post after testing out a chocolate sheet cake (also known as a slab cake) that is claimed by some, Pioneer Woman starting this trend, to be the best sheet cake ever.  It's called Texas Chocolate Sheet Cake, and there was something about the photos of this cake that made me want to dive in.   So dive in I did.

I didn't trust this recipe.  There were a few things I was sceptical about.  Adding hot mixtures to flour mixtures.  No need to grease the pan.  Jelly roll pan? What the hell is that?  I decided to trust Bakerella. She had never let me down before.

To start the cake melt butter in a saucepan, then, with the heat still on, add four heaped tablespoons of cocoa.


Combine thoroughly, then add boiling water.  Boil the mixture for 30 seconds before taking it off the heat.  Combine flour, sugar and salt.  Here comes the first part that freaked me out.  Pour the hot, yes hot, mixture over the flour mixture and stir slightly to cool.


Now this cake has buttermilk.  Any cake with buttermilk is sure to be a good cake.


Add eggs and vanilla to the buttermilk before adding the baking soda.  Don't forget this.  I did.  It made for an interesting 'cake' that we actually enjoyed immensely, but it was not the best. ever. chocolate sheet cake.  It was more like a brownie.  A great thing about forgetting the baking soda is that I felt compelled to make the cake again.

Anyway, add the buttermilk mixture to the chocolate mixture, stir together with not a mixer but a spoon.  Another sticking point.  Really? I don't need my beloved Kitchenaid? How will I ever justify its purchase if fabulous cakes can be made without it? I did get to lick the back of said spoon and it was good.  Very good.


Pour the mixture in to an ungreased pan.  This scared me.  Surely it would stick? I decided again to trust in the baking big guns.  I didn't grease.  I poured.  I baked.  Twenty minutes? You've got to be kidding me!  A great cake that is this easy to prepare and takes twenty minutes?  If all of these claims are true I can see this cake being made often in my house.  Easy.  Quick.  Full of pantry staples.  Tick tick tick. If only it were healthy.   Surely then it would have to win some sort of a prize.

Back to the pan.  The recipe called for a jelly roll pan.  I had no idea what that was and after good old Google assisted in increasing my knowledge base I ascertained that a lamington pan should do the trick.

Now for the frosting.  A similar process.  Melt butter, add cocoa, boil for thirty seconds, then add milk and vanilla.  Lastly add 400g of icing sugar.  Stuff sifting it.  Not required.  Stir, add nuts, and here comes the good part.  Pour it over the hot cake as soon as it comes out of the oven.  Eat a bit if you must, and you must.  Pour it evenly and let it spread to the edges.


Wait for the cake to cool and dig in.

So...the verdict is in.


As you can see by this empty container, the cake was very much enjoyed by all, both soda free and with soda!!!! It didn't stick.  My lamington pan worked just fine.  I can't really say if it is the best chocolate sheet cake ever, because I have never had a chocolate sheet cake before, but it is good.  Damn good.  If you are looking for an simple, incredibly tasty cake that can be easily shared then look no further.  I will be making this cake again, I know that for a fact.  I might just make it tomorrow...

Susie xx

{Texas chocolate sheet cake}

Cake

2 cups plain flour
2 cups sugar
1/4 teaspoon salt
4 heaped tablespoons cocoa
225 grams unsalted butter, chopped
1 cup boiling water
1/2 cup buttermilk
2 eggs, lightly beaten
1 teaspoon baking powder
1 teaspoon vanilla extract

Frosting

1/2 cup finely chopped pecans, or any other nut that takes your fancy
200 grams unsalted butter
4 heaped tablespoons cocoa
6 tablespoons full cream milk
1 teaspoon vanilla extract
400 grams icing sugar

Preheat oven to 175 degrees Celcius.

Combine flour, sugar and salt in a large mixing bowl.  Set aside.

Melt butter in a medium saucepan over medium heat.  Add the cocoa and stir to combine.  Add the boiling water and allow the mixture to bubble for 30 seconds before removing from heat.

Pour hot mixture over flour mixture and stir slightly to cool.

Combine buttermilk, eggs, baking power and vanilla, then add to the flour and cocoa mixture.  Stir until thoroughly combined.

Pour in to an ungreased lamington pan and bake for approximately twenty minutes.

While the cake is baking, make the icing.

Melt butter over medium heat in a medium saucepan.  Add cocoa and stir to combine.  Take the saucepan off the heat and add the milk, vanilla and icing sugar.  Stir to combine, then add the nuts.

When the cake is taken from the oven, pour the icing mixture over the cake while it is still warm.  Allow to cool.  Or not.  Then eat it.  I defy you to stop at only one square.  ;-)


Monday 18 June 2012

Chocolate and peanut butter biscuit cake {recipe}


I have a confession to make.  I am not very good at following instructions when it comes to baking requests.  Every time I ask my husband what type of cake he would like he requests what I like to call boring old chocolate cake (let's call it BOCC for the rest of this post shall we?).  He loves BOCC.  No bells and whistles.  The recipe for this cake comes from the Women's Weekly kid's birthday cake book.  Plain chocolate cake made with cocoa, and his favourite icing to have with said BOCC is boring old chocolate buttercream.  Not a fabulous icing made with fabulous chocolate, melted and whipped with love.  Just boring old buttercream made with boring old cocoa.  

I always end up denying him of his dream and making something much more interesting, and yet he still continues to request BOCC.  This year he asked for BOCC with peanut butter icing.  A slightly more interesting take, and I decided to honour his request.  Sort of.  I WAS only going to make one modification.  I knew that peanut butter chocolate chips existed and decided to take a trip to USA Foods to buy some.  Alas they didn't have any in stock.  I spied some Nutter Butters.  


Nutter Butters are peanut butter sandwich cookies from the US.  Hmmmm.  Crushed up cookies in the BOCC was a great idea!  Cookies were bought and preparations were made to bake this BOCC with a twist.  

Incidentally, if you are looking for a good BOCC, look no further than the Women's Weekly recipe.  It is dead easy to make so it's a good one for baking with the kids, it's not delicate and it is good for carving in to shapes.  It is nice and moist and isn't too dense.  I actually quite like it!  

You basically just throw flour, cocoa, butter, vanilla, caster sugar, eggs and water into a bowl.  


Oh.  I remember.  I cheated again.  I decided to use premium cocoa instead of boring old cocoa.  Look at this stuff.  How could you not want to use it in every recipe that calls for cocoa?


It has such a beautiful colour and the aroma is to die for.  I get off on shoving my nose in the bag.  The one I am using at the moment is from The Essential Ingredient.  


It is $15 for 500g and I think it is well worth the cost.  It really takes the chocolate flavour of cakes to the next level.  Heaven!  

Anyway, back to the BOCC.  Once everything is in the bowl of your mixer, beat it on medium speed until is is well combined and paler in colour, about three minutes.  Prepare the pan of your choice (we used an eight inch round pan) by greasing and lining it with baking paper.  Here is my eager baking assistant preparing our pan.  


Before pouring the mixture into the pan we broke up six Nutter Butters and put them in the base of the pan.


We also broke up six more Nutter Butters and folded them in to the cake mixture, just for good measure.


Pour the mixture into the pan and bake in a moderate oven until cake is cooked, which in our case was 40 minutes.  


As you can see in the photo, our cake cracked on the surface.  This happens when the oven is too hot and the surface of the cake cooks before the mixture has had a chance to rise.  I kinda like how it looks with this cake though!  It reminds me of a big brownie. Normally I would take the top off the cake to make it level but this looked so appealing that I decided to keep it.  Imagine peanut butter frosting falling in to those crevices - yum!    

Now on to the icing.  You might remember the peanut butter filling from my dark chocolate peanut butter cake.  We halved that recipe and used it to top this BOCC with a twist, and it suddenly ceased to be BOCC but a very appealing looking cake.  It was a bit late in the day when we made our cake and it hadn't had a chance to cool properly before we iced it and ate it, but you know what? Warm cake with peanut butter icing, melting in to those fabulous looking cracks? Don't mind if I do!  


You can't see it, but the icing was bordering on melting on top of the still warm cake.  Yum!


Of course Elloy needed help blowing out his candles.  :-)


Not bad at all for a BOCC.  :-)

{Rich Chocolate Cake}
recipe from The Australian Women's Weekly

1 1/3 cups self raising flour
1/2 cup cocoa
125g unsalted butter, softened
1/2 teaspoon vanilla extract
1 1/4 cups caster sugar
2 eggs, room temperature
2/3 cup water

Preheat oven to 180 degrees Celsius.  Grease and line your chosen pan.  

Sift flour and cocoa into a medium bowl (I've recently quit sifting but go right ahead if you must!).

Add remaining ingredients and beat on low until combined.  Increase the speed to medium and beat until well combined and paler in colour, approximately three minutes (less if you are using a Kitchenaid). 

If you are going to add biscuits to your cake, now is the time to do it.  We chose to put some on the base of the pan and mix some more in to the batter.   

Put mixture in to a pan and use a palette knife to spread to the sides. 

Bake until cooked.  Stand in the pan for ten minutes before turning out to cool.  

If you want to top the cake with peanut butter frosting you can get the recipe here.

Susie xx

Thursday 7 June 2012

Out of this freaking world peanut butter chocolate chip cookies {recipe}


Stop whatever you are doing.  Stop now.  Get thee to a supermarket, buy the ingredients for these cookies, go home and make them.  It is a must.  They are simply that good.  I know there are a few very strange people out there who claim that they dislike the combo of peanut butter and chocolate.  They are weird and I am going to pretend for the rest of this post that they don't exist.

As most of you will know my husband is a freak for peanut butter.  He adores it, as do my children.  We go through two jars of the stuff a week.  Peanut butter on toast, peanut butter on crumpets, peanut butter on fruit toast, peanut butter on a spoon, the list goes on and on and on.  I like the it, but it is not my be all and end all.  Unless of course you combine it with chocolate, and then it is my place to be.


So you can imagine my glee when my husband requested peanut butter and chocolate baked goods to celebrate what he calls his birthday week.  I scoured the internet looking for inspiration, and inspiration I found in the form of cookies.  There were so many recipes to choose from, but the ones by How Sweet It Is ticked all of the right boxes for me.  Everyone has their cookie criteria.  Thin or thick.  Soft, hard or chewy.  Full of choc chips or just a smattering.  I am a thick, soft, full kinda girl.  I do like a chewy cookie too, but I think of Anzacs when I think chewy.  Choc chip cookies say soft to me.  These said thick, soft, full to me.  And they had peanut butter within their thick, soft, fullness.  Ingredients were bought, and then Will and I set to work.


We melted the peanut butter and butter together and set it aside to cool.  We combined the flour and the bicarb soda.  We added the sugar to the butter mixture, and then added the eggs to this mixture.  We gradually added the flour to this lovely brown combination, and then stirred in the choc chips.  Small balls of the dough were placed on a baking sheet, and they were cooked for ten minutes.


When they came out of the oven I was quite confident that we had discovered greatness.  They looked like hero cookies.  The recipe called for a period of cooling.  Will and I struggled to comply with this direction.  We felt compelled to try one while it was still warm and oozing chocolate from its inner core.  And my oh my were we glad that we did.  My boxes had indeed been ticked.


Suffice is to say that these cookies will be made again in this house.  And again.  And again.  And again.

{Peanut butter chocolate chip cookies}
adapted from How Sweet It Is
Makes 24+ cookies


2 cups plain flour
1/2 teaspoon bicarbonate of soda
115g salted butter
85g smooth peanut butter
1 cup brown sugar, loosely packed
1/2 cup sugar
1 egg and 1 egg yolk, room temperature and lightly beaten
2 teaspoons vanilla extract
1 - 1 1/2 cups dark chocolate chips

Preheat the oven to 165 degrees C.  Line two baking sheets with baking paper.

Melt the butter and peanut butter together in the microwave in fifteen second bursts until it is combined.  Set aside to completely cool.

Combine flour and bicarb soda.

Once butter mixture is completely cool, add sugars and combine.  Add eggs and vanilla to this mixture.  Once combined, gradually add flour to form a dough.  Add chocolate chips to the dough and combine.

Place small balls of dough on a baking sheet, far enough apart to let them spread while baking, and place them in the oven for 10-12 minutes.  They should come out of the oven when they are ever so slightly brown.  They will still be quite soft at this point but will firm up upon cooling.

Cool, then eat!  Or maybe you could skip the cooling part and go straight to the eating part.  Your choice!

A few notes about this recipe ~

I know I always bang on about it, but your cookies will be drastically improved if you can get your hands on some good quality vanilla extract.  Don't use essence.  It just doesn't cut it.

It is really important that you let the butter mixture cool properly or the biscuits won't be the successful pillows of goodness that they should.  Shove it in the fridge to speed up the process if you must, but make sure you don't then let it chill.

I did try to get my hands on some American peanut butter for this recipe but was unsuccessful, so good old Kraft it was.  I would like to try it with the American stuff some time soon.  I'll keep you posted as to how they turn out.  We used smooth PB for our cookies, but I think crunchy would be great too.  Give it a try!

I never thought I would hear myself say this, but I think one and a half cups of choc chips was a little excessive.  Next time we make them we will go for one cup.  If your preference is for an overload of choc chips then one and half cups it is.

Susie xx


Wednesday 6 June 2012

DIY cake stands, Ikea style


I love Ikea.  I could go there every day.  I was so happy when a new Ikea appeared around the corner from my home.  Finally I could go there without having to pack a lunch.  Luckily for me my kids love it too.  They love to test out the furniture, and to help me to find things in the self-serve area, and the anticipation of a shopping trip that ends in a $1 hot dog means that they, and my husband, are happy to go there any time.

The last few times I have been to Ikea I have remembered online tutorials I have seen about how to make your own cake stand with a candlestick and a plate.  Check out this one here by The Sweet Adventures of Sugarbelle for a great example of what I mean. 

Today when I visited the blue and gold Springvale landmark I had planned on acquiring some of these candlesticks and plates to make some cake stands of my own.  We have been renovating and I have some more cupboard space now.  What should I fill these cupboards with? Cake paraphernalia of course!!!

Upon entering the Market Hall I spied some really beautiful and really cheap coloured glasses and wondered whether they would work as a base for a cake stand.


I had a play around with some matching plates and decided to give it a whirl.  I love the combination of teal, pink and off white.  It took me a while, but I decided on these colours for my stands.


Making the cake stands is really quite simple.  After you have selected your plates and glasses you need to plug in your hot glue gun, or in my case you need to plug in Ang's hot glue gun.  Writing this post has reminded me that I borrowed her gun months ago and haven't returned it.  Sorry Ang!


While you are waiting for the glue gun to heat up, get yourself a piece of sandpaper and rough up the parts of the glasses and plates that will be touching to create a rough surface area for the glue to bond with.  We all love a bonding session don't we?


Place the plate that matches your glass upside down on a flat surface.  Now that your glue gun is hot, quickly run a bead of glue around the edge of the underside of the glass, where you have sanded it back.  Let's all pause now to check out my lame action shot.


You need to work quickly when doing this as the glue doesn't take very long to set.  I mean with lightning speed.  As soon as you have put on your glue, turn the glass upside down (which is really the right way up.  Confusing, no?) and stick it on the plate, being extra careful to have it centred.  There are no second chances with this so make sure you are confident!  


Now leave the cake stand to dry for a while.  It doesn't take long at all, in fact I was really impatient and turned them around pretty much immediately with no problems.


I just love my cake stands, and now that I have started I feel like the possibilities are endless!


The best part about these cake stands - they cost me a combined total of $22!  

Susie xx

Monday 28 May 2012

Healthy(ish) Muesli Slice {recipe}


Today we had a day at home as my husband stayed at home from work sick and my youngest kidlet, Ollie, was also under the weather.  What to do during a morning at home? Bake of course! I am very conscious of being a good role model for the kids and I don't like them eating much junk food so I decided that Will and I would make something healthier than cakes and biscuits.  We came up with a muesli slice that turned out really well so I thought I would share the recipe.  There are loads of different muesli slice recipes out there, and this one is our interpretation.  There are endless combinations, so feel free to substitute different ingredients.  In the future I am going to experiment with making the slice with less butter and see how it holds together.  I'll keep you posted!

My little helper.  :-)


{Muesli Slice Recipe}

Ingredients
1 cup rolled oats
3 cups rice bubbles
1/2 cup shredded coconut
1/4 cup sunflower seeds
1/4 cup pumpkin seeds
1/3 cup currants
1/3 cup dried cranberries, chopped (we use the unsweetened ones that can be purchased at good nut shops)
1/3 cup dried apricots, chopped
4 tablespoons honey (we used yellow box honey)
4 tablespoons peanut butter (we used a smooth no added sugar no added salt variety)
125g unsalted butter, chopped
1/4 cup brown sugar

Line a 20x30cm lamington pan with baking paper.

In a large bowl combine the oats, rice bubbles, coconut, seeds, currants, cranberries, and apricots.

Put the honey, peanut butter, butter and sugar in a medium bowl and melt it in 30 second bursts, stirring in between, until it is well combined and slightly thickened.  Add to the dry ingredients and stir until combined, taking care as the mixture will be very hot.  Press the mixture into the prepared pan, pushing it down with the back of the spoon so that it holds its shape once set.  Put in the fridge for a minimum of an hour before cutting. Store the slice in the fridge.

Susie xx